Well if you know me you know
I am always cleaning and organizing.
It was time to hit the Stamps sets that I have been acquiring.
Several of the packaging was tearing with repeated use &
my need to have everything uniform took over -
I have started the project & have it well under way.
I used the Avery Elle Storage Pockets
I used the small and large pockets.
Next I cut cardstock to fit in each pocket,
I just used the cheap cardstock.
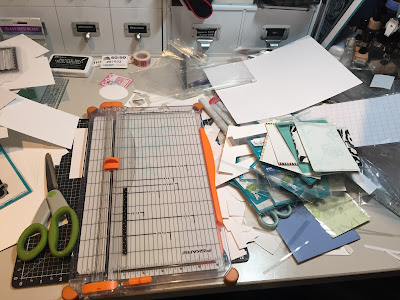
This picture is the mess that is created as I cut cardtsock
and got rid of packaging.
The lovely Kristy printed all of my labels for me ( twice, sorry Kristy),
and I attached them to the Cardstock.
I know most people uses a label maker, but this was just easier ,
faster and cheaper with all of the sets I needed to do.
The back of this cardstock has another label with the number
of dies in the set - if i have the matching set.
( I will sho this once I have completed the entire task!)
Here are all of the beautiful pockets in my bin labeled.
There are 3 bins in this set,
they are 1, 2 & 3.
They all hang on a ladder stand & was
purchased at Hobby Lobby 40% off.
I have been waiting 2 weeks for MFT to get the tall pockets
in stock. As you can see the left side of the bin above
has my MFT tall stamps & other various stamps that
are too tall for the Avery Elle large pockets.
Hopefully they get them soon and I can complete this job &
post my final pictures!
Thanks for stopping & and have a great day~!!


very cool!
ReplyDeleteAlicia
This is how I organize my stamps, too!! And my dies. I have smaller clear CD packets for the smaller dies and then I organize them by theme. A ton of work, but it makes it so much easier to find when I need them :) Have a great evening!! Big hugs :)
ReplyDeleteLisa
A Mermaid's Crafts
I finally finished this same project about a month ago... thank goodness too.. Tons of work.... The only thing I do differently is -- When I add my dies to the matching stamp set, I put a circle dot on the front of the stamp set (next to the label) - This way I know it has a matching stamp set - It's on the back side of it... but sometimes I don't pay attention on what has a stamp set or not - This just makes it easier to know - I have a lot of stamp sets without matching dies because I have the brother Scan N Cut machine - But then I also have stamps with dies,because that's how some come when you purchase them... I also made mine like you did... I didn't use a label maker... I didn't have one when I started my project, so I didn't bother after I had gotten it - Of course now... I just write on the label instead of typing it out.... It's just faster for me and since I'm the only one who needs to see what I got... then it's okay with me! LOL
ReplyDeleteIf you're interested in the Larger Pocket Envies for storage - I use some I get from Amazon.... Here's a link in case you want to find a less expensive route for storing your stuff -- https://www.amazon.com/gp/product/B071RSPQ3R/ref=oh_aui_detailpage_o07_s00?ie=UTF8&psc=1 (these are the smaller sizes)
https://www.amazon.com/gp/product/B01FS16OPA/ref=oh_aui_detailpage_o08_s00?ie=UTF8&psc=1 (these are the taller ones)
They are usually on sale when available - Just thought you might want to know!
Have a great weekend!
Theresa