As you all know by now
I love to put together kids Birthday parties.
This year my daughter and husband were in charge of photo
so I apologize that I do not have alot of detail photos after all of that work!
This year was Pokemon
and I splurged on what the kids took home &
what the party consisted of & I tried to keep the decorations
as cost effective as Possible.
The decorations I was able to start a week in advance to
save me time on party day.
WARNING THERE ARE ALOT OF PHOTOS!!
I started with our bck Porch as that is where the kids come
into the house / party so I wanted to set the tone here.
I had streamers hung gathering around the light
where I had a lantern I painted that looked like a Pokeball.
In the corner I turned my winter tree into a hat tree
so all the kids could pick a colour when they came in.
I purchased some Foil balloons from China -
order more than you need and make sure
to do this at lease 3 months from party date!!
Then I purchases a small helium tank fro Michael's to fill them.
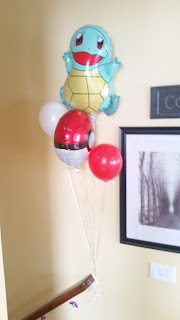
This is hubbys idea of a picture of balloons -
this balloon is balbasaur.
From there they headed downstairs to design a Pokeball that would be
judged later in the party in hopes of winning a prize.
This kept all the kids busy as the other kids arrived.
Colouring isn't a selling point until you say the word PRIZE.
We coloured Pokemon & cut them out to that as you went down the Stairs
you felt like you were being surrounded by Pokemon.
Squirtle was at the top of the Banister
There were more pokemon on the Bulkhead & Balloons
coming from banister at bottom
again no photo!
Here is the first of 3 buntings made by colouring small pokemon.
The Fireplace I kept simple.
Here is another Pokeball lantern & a longer bunting,
accompanied by 2 pokemon stuffies.
The front window I kept very easy, we blew up balloons &
strung them with jute from corner to corner.
It was pretty cold that do so they shrunk a little.
You can see red swirls hanging from the ceiling & small foam balls
painted to look like pokeballs
Yo can see one well in the op photo, looks like it is attached to star
on the mantle but it is hung about a foot in front.
I have omitted the large coffee table as it is surrounded with kids,
there was a small table in the hall with a pokemon puzzle on it,
this worked well for two girls who were quieter & wanted to have a little time out.
Upstairs living room had more streamers with pokeballs
the table was simple as it would be covered soon enough &
the Pokemon table cloth arrived a week after the party,
if ordering 2 months is the average from China -
so give yourself lots of time!
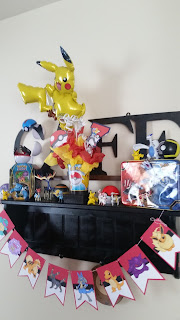
This is the shelf with the 3rd bunting above the table.
I placed all of my sons Pokemon on the shelf
for decoration & to make sure they were not mixed in with the others
Here is the birthday boy playing one of the games.
This was by far the hardest game.
Downstairs they had to stand on large cardboard pokeballs
& keep yellow pikachu balloons up.
they could not step of the pokeball & the highest number won.
Next on the air hockey table we have Pokemon
Ice cream bowls (from Party City) & they played aversion on Beer pong
which they all loved! They had 3 balls & they had 3 chances to sink them all.
everytime they completed a game they picked Pokemon out of a Pail above thier heads.
The more games & rounds they completed, the more pokemon they earned.
To a max of 12 - I quickly had to add in!
Made completely from cardboard & Paint!
After games and prizes was snack time.
I googles Pokemon water bottle labels & had a great
assortment to choose from, thanks all who share!
The local pizzeria places pepperoni on half &
cut into squares to make the pieces smaller.
You can always have more, but I find full slices get wasted!
I have a pokeball Pizza Sign,
Charzard Chips, Magikarp crackers
& of course Squirtle Spit.
I always make cupcakes but he had his heart set on
a Pikachu cake - I was a bit stressed.
Pinterest to the Rescue.
Google Frozen Buttercream Transfer & any colour page can be
you caketop design.
Just try to keep it a simple design!
Not to bad I if I do say so!!
Here is what the kids took home -
they each got one Cinch sac, One Trainer hat,
one pokeball & the pokemon they earned by playing games.
In the sac was a colouring / activity book I made
as well as a pokemon fortune teller.
Here is a sample of the pokemon from China
they came in sets of 144.
Lastly we suited them up & went outside
with their sacs to do the pinata.
I filled it as full as I could & let that candy
be the candy for their loot bags.
Once candy was all picked up we played outside
& waited for pick up.
That was the fasted 2.5 hours yet!
All in all the birthday was given excellent reviews by the kids.
Now another year to see what theme the next party will be
& I will be making sure I have good pictures before the kids come!


